Automated Integration Testing Tools and Frameworks for Efficient QA
Integration testing plays an important role in verifying that various components of a software system interact correctly. It helps ensure that these parts work together smoothly, identifying issues that might not surface during unit testing.
In this article, we will explore the benefits of automating Integration testing in software development, and a case study using three popular tools to illustrate the implementation of automated integration testing in a real-world scenario.
What Is Integration Testing?
Integration testing is a level of software testing in which individual units or components of a software application are combined and tested as a group. The primary goal of integration testing is to ensure that the interactions between these components when integrated, work as expected and that the application functions correctly as a whole.
Unit Testing vs. Integration Testing
Scope:
- Unit Testing: Tests individual units in isolation (functions, classes).
- Integration Testing: Tests interactions and interfaces between integrated units.
Testing Depth:
- Unit Testing: Focuses on internal logic of a single unit, avoids external dependencies.
- Integration Testing: Validates interactions between multiple units, includes external dependencies like databases or APIs.
Purpose:
- Unit Testing: Verifies correctness of individual units, catches bugs within a unit.
- Integration Testing: Ensures collaboration between units, detects integration-related issues.
Dependencies:
- Unit Testing: Independent of external dependencies, uses test doubles (mocks, stubs).
- Integration Testing: Requires external dependencies, verifies integration points with other components.
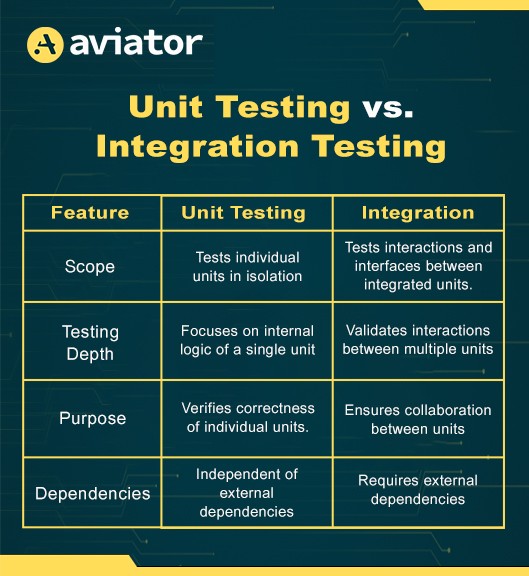
Unit testing is concerned with the correctness of individual units of code, while integration testing focuses on the interactions and integration of multiple units to ensure they work together as expected.
Importance of Integration Testing in Software Development
Integration testing is a critical phase in the software development lifecycle where individual components or modules of a system are tested together to uncover issues related to their interactions.
This type of testing ensures that various parts of a software application collaborate as intended and that data flows correctly between them.
Benefits of Integration Testing
- Interface Issues: Identifies data passing errors, inconsistent APIs, and communication breakdowns.
- Error Localization: Pinpoints failure locations for quicker fixes.
- End-to-End Functionality: Verifies software’s correct operation for a reliable user experience.
- Risk Reduction: Early issue detection lowers the risk of critical problems in later stages.
Challenges in Manual Integration Testing
Manual integration testing, while necessary, can be a time-consuming and error-prone process. Here are some of the challenges associated with manual integration testing:
- Manual testing for complex software is time-consuming, slowing down development cycles.
- Requires dedicated testers, incurring high costs for organizations.
- Human error can introduce inconsistencies in test execution and miss critical scenarios.
- As software complexity increases, manual testing struggles to scale with the growing number of integration points.
Roles of Automation in Enhancing Integration Testing
Automation is the solution to many of the challenges posed by manual integration testing. By leveraging automation tools and frameworks, you can streamline the testing process, improve accuracy, and expedite the feedback loop. Here’s how automation enhances integration testing:
- Speed: Automated tests run faster, enabling frequent testing cycles.
- Consistency: Tests execute consistently, reducing human errors.
- Coverage: Automation tests a wide range of scenarios comprehensively.
- CI/CD Integration: Seamless integration provides immediate feedback on code changes, allowing early issue detection.
In the subsequent sections of this article, we will delve deeper into the tools and frameworks available for automating integration testing.
Choose the Right Tools and Frameworks for Automation Testing
Selecting the right tools and frameworks for automating integration tests is a crucial decision that can significantly impact the efficiency and effectiveness of your testing efforts. Let’s explore the criteria for tool selection and discuss some popular automation tools and integration testing frameworks for integration tests.
When evaluating system integration testing tools for integration testing needs, consider the following criteria to make an informed decision:
- Programming Languages and Technologies Compatibility
- Community Support and Documentation
- Reporting and Visualization Capabilities
Popular Automated Integration Testing Tools
Let’s take a closer look at some popular automation tools commonly used for automating integration tests:
- Language Support: Selenium supports multiple programming languages, including Java, Python, C#, and JavaScript, making it versatile for various development environments.
- Browser Compatibility: Selenium is widely used for web application testing and supports a broad range of web browsers, including Chrome, Firefox, Safari, and more.
- Community: Selenium has a large and active community, which means extensive online resources, forums, and support.
- Focused on Web Applications: Cypress is designed specifically for testing web applications and provides a rich set of features tailored to this domain.
- JavaScript: Cypress uses JavaScript for test scripting, which may be advantageous if your project primarily involves JavaScript development.
- Interactive Debugging: Cypress offers real-time debugging capabilities, allowing testers to see what happens at each step of a test.
- API Testing: Postman is a popular tool for testing APIs. It allows you to create and execute API requests, making it ideal for integration testing of APIs.
- Collections: Postman collections enable the organization of API requests into logical groups, facilitating test case management.
- Automation: Postman provides options for automating API tests, making it suitable for incorporating into CI/CD pipelines.
Integration Testing Frameworks
In addition to automation tools, you would also need integration testing frameworks to structure and manage your integration tests. Here are some commonly used testing frameworks for integration testing:
- Python Support: Pytest is a popular testing framework for Python applications, offering a simple syntax and powerful test discovery mechanisms.
- Rich Ecosystem: Pytest has a rich ecosystem of plugins and extensions that enhance its functionality and support various testing needs.
- Java Support: TestNG is a testing framework for Java applications. It provides advanced features such as parallel test execution, data-driven testing, and test grouping.
- Annotations: TestNG uses annotations to define test methods and specify test configurations, making it easy to create and manage test suites.
- C# Support: NUnit is a testing framework for C# applications, offering similar features to JUnit and TestNG.
- Attributes: NUnit uses attributes to define tests and test fixtures, making creating and managing test suites in C# projects easy.
These tools and frameworks, when used in conjunction with best practices, can streamline your testing efforts, improve test coverage, and contribute to the overall quality of your software.
Setting Up Automation for Integration Tests
Let’s talk about some of the essential steps required to set up automation for integration tests include configuring the testing environment, managing dependencies, and writing test scripts.
Environment Configuration and Dependencies
Environment Setup:
- Development Environment: Set up necessary software and libraries for test automation integration, including code editors, version control systems, and language runtimes.
- Testing Environment: Create a testing environment mirroring the production setup for accurate testing.
Dependency Management:
- Package Managers: Utilize npm, pip, or Maven to manage project dependencies and automation tools.
- Virtual Environments: Use tools like Docker to isolate dependencies, ensuring consistency across various development setups.
Writing Test Scripts
- API Testing Tools: Choose tools like Postman or Requests for API interactions, covering diverse endpoints and response scenarios.
- Authentication: Implement required authentication methods such as API tokens or OAuth in your tests.
- Data Handling: Prepare test data, considering dynamic data generation or using mock data.
Simulating User Interactions
- UI Automation Tools: Select Selenium or Cypress for simulating user actions in web applications.
- Test Cases: Write test cases replicating critical user interactions like form submissions and button clicks.
- Asynchronous Actions: Handle asynchronous actions like AJAX requests for accurate testing.
- Cross-Browser Testing: Verify application functionality across multiple browsers and versions.
- Data Management: Plan test data management, including database setup or generation scripts.
- Data Mocking: Use mocking libraries to simulate external services, isolating tests from external factors.
- Data Cleanup: Implement mechanisms to clean up test data post-execution for a consistent testing environment.
By following these steps, you can establish a solid foundation for automating integration tests.
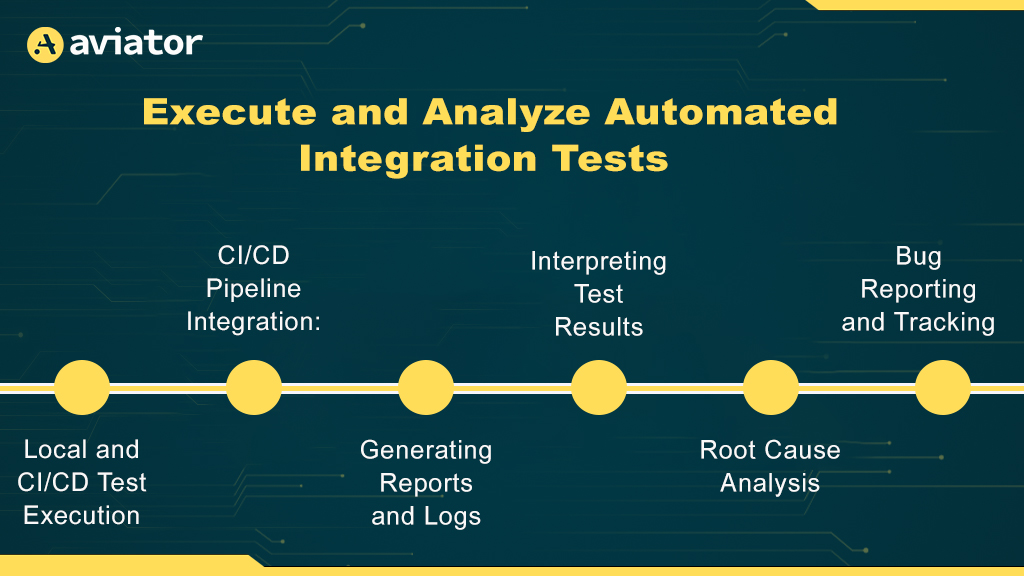
Execute and Analyze Automated Integration Tests
Let’s also consider the steps involved in executing and analyzing automated integration tests include running tests locally, integrating them into CI/CD pipelines, generating reports and logs, and interpreting test results and failures.
Local and CI/CD Test Execution:
- Setup: Configure local environment with necessary dependencies and tools.
- Running Tests: Execute tests using chosen automation tool via CLI or IDE.
- Debugging: Use automation tool features for script debugging.
CI/CD Pipeline Integration:
- Version Control: Link repository with CI/CD system for automated test triggers.
- Automated Integration Testing: Integrate tests into CI/CD pipeline for continuous validation.
- Parallel Execution: Run tests in parallel to optimize pipeline speed.
Generating Reports and Logs:
- Test Execution Reports: Automation tools provide detailed test execution reports.
- Custom Reports: Develop custom reports for additional insights or visualizations.
- Logging: Implement logging in scripts for vital execution data.
- Debugging Output: Ensure clear error messages and stack traces for effective debugging.
Interpreting Test Results:
- Passed Tests: Validate expected behavior in various scenarios.
- Failed Tests: Investigate reasons behind failures, such as incorrect assertions or unexpected responses.
- Failure Investigation: Refer to logs, reproduce failures locally, and pinpoint issues.
Root Cause Analysis:
- Code Review: Check recent code changes linked to failed tests.
- Environment and Data: Consider external factors like environment changes or data inconsistencies.
Bug Reporting and Tracking:
- Issue Tracking: Report genuine bugs in project’s issue tracking system.
- Re-Run Tests: After fixes, re-run tests to confirm problem resolution.
By following these steps, you can effectively execute and analyze automated integration tests as part of your software development process. This approach ensures you catch integration issues early, facilitate debugging, and maintain a reliable and robust codebase.
Case Study: Implementing Automated Integration Testing
This is a case study that illustrates the implementation of automated integration testing in a real-world scenario. We’ll cover the scenario description, tool and framework selection, test script creation and execution, and the results **providing practical examples and guidance on implementing these strategies using popular tools and frameworks, including FastAPI, to help you overcome challenges and automate integration tests successfully.
Scenario:
Imagine you work for a software development company that is building a modern e-commerce platform. The platform consists of various components, including a web application, a RESTful API, and a backend database. Your team is responsible for ensuring the smooth integration of these components and maintaining a high level of quality in the application.
Challenges:
- Frequent code changes and feature additions are causing integration issues.
- Manual testing is time-consuming, error-prone, and slowing down the development process.
- Ensuring that customer data remains secure and consistent across the platform is a top priority.
Tool and framework selection:
- Selenium: For UI automation.
- Postman: For API testing and executing API requests.
- Pytest: For structuring and managing integration tests.
Test Script Creation and Execution Using Selenium
When using Selenium to write test, it doesn’t provide a testing tool/framework. You can write test cases using Python’s pytest module. Other options for a tool/framework are unittest and nose. In this example, we use pytest as the framework of choice and chrome’s web driver, Chronium to test the login process in an application. The choice of what web driver to download is as a result what web browser you want to use.
Install Selenium, Pytest and download the appropriate WebDriver in this case ChromeDriver, and add to Path. You can check out how to install the ChromeDriver and add it to path here.
# Install the Selenium WebDriver, pytest and necessary browser driver which is ChromeDriver
# pip install selenium pytest
# Download ChromeDriver: https://sites.google.com/chromium.org/driver/downloads
Import the required module:
from selenium import webdriver
from selenium.webdriver.chrome.options import Options
from selenium.webdriver.common.keys import Keys
from selenium.webdriver.common.by import By
Create an instance of the Chrome WebDriver to control the browser.
options = Options()

# To open the browser maximized
options.add_argument("start-maximized")

# To keep the browser open
options.add_experimental_option("detach", True)

# Initialize the web driver (assuming you've downloaded and placed ChromeDriver in your PATH)
driver = webdriver.Chrome(options=options)
Define a test function **test_logIn** for simulating user interactions on the website. Navigate to the website, inserts the email and password you provided after searching for the field using driver.find_element and use the Return key to press enter.
def test_logIn():
    # Insert the 'email' and 'password' credentials
    email = "[email-address]"
    password = "[password]"
   # Navigate to the login page
    driver.get("[website-url]")  # Replace with the login page URL

    # Check the title of the page
    assert "TestWebsit" in driver.title

    # Find and interact with the email and password fields
    email_field = driver.find_element(By.NAME, "email")
    password_field = driver.find_element(By.NAME, "password")

    email_field.send_keys(email)
    password_field.send_keys(password)
    # Enter the 'RETURN' key
    password_field.send_keys(Keys.RETURN)
Close the browser to release resources.
# Clean up: close the browser
driver.quit()
To run Selenium UI tests, you’ll need to make sure you have the Selenium WebDriver set up and installed. Here’s how to run the Selenium UI tests:
pytest ui_test.py
The script will launch a Chrome browser, navigate to the specified website, perform the user interactions, and verify the results.

Pytest for Integration Testing
Pytest test cases are written to test the interaction between the web application and the RESTful API. These tests ensure that data flows correctly between the frontend and backend. In this example, the Sign-up endpoint is tested.
Import the libraries and classes that will be used:
import httpx
import pytest
import pytest_asyncio
from typing import AsyncIterator
from fastapi import FastAPI, status
from pydantic_settings import BaseSettings
Instantiate the FastAPI class. Write a schema for the endpoint you want to create and create your endpoint:
app = FastAPI()

class Register(BaseSettings):
    username: str
    password: str
    email: str

@app.post("/register", status_code=status.HTTP_201_CREATED)
async def signUp(register: Register):
    return {
        "username": register.username,
        "email": register.email
    }
Define a Pytest fixture client that uses the httpx.AsyncClient to make asynchronous operations instead of the FastApi’s TestClient for making synchronous operations
@pytest_asyncio.fixture
async def client() -> AsyncIterator[httpx.AsyncClient]:
    async with httpx.AsyncClient(app=app, base_url="http://testserver") as client:
        yield client
Define an asynchronous test function (**test_api_integration**) for integration testing. Use an async HTTP client (**httpx.AsyncClient**) to simulate user registration and login. Assert the response status codes and verify that the data provided is accurate.
@pytest.mark.asyncio
async def test_api_integration(client: httpx.AsyncClient):
    # Simulate a user registration and login process
    registration_data = {
                "username": "testuser",
                "password": "password123",
                "email": "testuser@example.com"
            }

    response = await client.post("/register", json=registration_data)
    assert response.status_code == 201
    assert response.json() ==  {
                "username": registration_data['username'],
                "email": registration_data['email']
            }
            # Perform additional integration tests as needed
Place your Pytest integration test code in a Python file, e.g., integration_test.py. Open a terminal and navigate to the directory where integration_test.py is located. Run the Pytest test suite: pytest integration_test.py, Pytest will discover and run the test functions within the specified Python file. Ensure that your FastAPI server is running and accessible at the base URL specified in the test script.

By following these steps, you can execute the UI, API, and integration tests to verify the functionality of your application. Make sure to customize the test scripts according to your specific application and requirements before running them. Tests are also integrated into the CI/CD pipeline, triggering automated test runs on each code commit and deployment.
Postman for API Tests
API test suites are developed to verify the functionality of the RESTful API. Tests include endpoints for user registration, product retrieval, and order processing. In this example, we would test the Sign-Up endpoint created while using pytest.
Download the Postman application into your computer and create an account. Alternatively, you can use the Postman web application but in this example, we are making use of the desktop app.

To begin, create a Workspace by clicking the dropdown arrow. Create a collection by clicking the Create Collection icon.

Provide the URL to the endpoint you want to test, do not forget input the correct http method.

Add a request body if required. In this case, a body is required. Click Send.

Check the response body to make sure what you want is being returned.

When the Endpoints become much, you can choose to run the collection as a whole instead of testing the endpoints individually.
Results and impact on QA process
- Integration issues are detected and resolved much earlier in the development process, reducing the cost and complexity of fixing them.
- UI tests with Selenium have identified and resolved several user interface issues, leading to an improved user experience.
- API tests in Postman have helped ensure that the RESTful API functions correctly, maintaining data integrity and security.
- Integration tests with Pytest have confirmed that the components of the e-commerce platform work seamlessly together, reducing integration-related bugs.
In this case study, the implementation of automated integration testing using Selenium, Postman, and Pytest has significantly improved the software development process. Integration issues are caught early, leading to a more efficient and reliable QA process and a higher-quality e-commerce (example) platform for customers.
Best practices for effective automation
To ensure the success of your automated integration testing efforts, it’s essential to follow best practices that promote efficiency, reliability, and maintainability. Below are some:
- Isolate tests to prevent dependencies on prior states.
- Programmatic data creation ensures replicable testing.
- Implement cleanup mechanisms for a consistent environment.
- Regularly update tests to match application changes.
- Remove redundant tests for efficiency.
- Keep documentation and reports clear, concise, and up-to-date.
In this comprehensive exploration of automated integration testing, we’ve covered the significance of this testing approach and the tools, frameworks, and best practices that enable its successful implementation.
FAQs
What Are the 4 Types of Integration Testing?
The main types are Big Bang, Top-Down, Bottom-Up, and Sandwich. Big Bang integrates all components at once, while Top-Down and Bottom-Up integrate modules in order. Sandwich combines both approaches for balanced coverage.
Is API Testing Integration Testing?
API testing can be integration testing when it checks how different modules or systems interact via APIs. It ensures proper data exchange and workflow between components, though some API tests may focus only on individual endpoints.
Is Selenium Integration Test?
Selenium is primarily used for UI or end-to-end testing. While it can test workflows involving multiple components, it isn’t specifically meant for integration testing and focuses more on user-facing functionality.
Is Integration Testing Done by QA?
Yes, QA often performs integration testing to ensure that connected modules work together correctly. Developers may also contribute, but QA plays a key role in validating system integration.