Spec-Driven Development: The Key to Scalable AI Agents
Spec-driven development is not a choice but a necessity as we move from vibe coding a cool app to building real-world brownfield projects.
“The person who communicates the best will be the most valuable programmer in the future. The new scarce skill is writing specifications that fully capture your intent and values,” Sean Grove from OpenAI said recently at the AI Engineer conference.
Specifications, not prompts or code, Grove says, are becoming the fundamental unit of programming, and writing specs is the new superpower.
As AI makes it easier than ever to generate code, two things have become clear. The first is that generating more code with AI does not remove complexity from software engineering; it just abstracts it away to debugging, testing, and deployment pipelines.
Writing Code Isn’t the Bottleneck
The bottleneck is knowing what to build, gathering requirements, knowing why to build it, and, ultimately, knowing if it has been built correctly and achieved its intentions. Engineering organizations are going to feel that squeeze the more advanced the AI models get, Grove points out.
Design alignment across teams, resolving conflicting requirements, eliminating tech debt, bringing rigor to code reviews, and preserving institutional knowledge when senior engineers leave are listed as the fundamental challenges that make building software difficult in Amazon’s announcement for its AI IDE and the concept of spec-driven development.
The main thing that determines whether an agent succeeds or fails is the quality of the context it’s given. And, if we want agents to succeed not only at vibe coding cool apps from scratch, but in messy, brownfield enterprise codebases, giving agents the right context—or context engineering—is the missing piece to make it happen.
But getting context is hard. Even as LLMs’ context windows are increasing, we already know that providing larger context to LLMs actually drops the quality. The secret is the quality of the provided context.
Specs are “refined context” that provides just enough information to the LLMs to be effective without being overwhelmed.
What Is Spec-Driven Development?
Spec-driven development is the practice of writing specifications before writing code—or asking an AI tool to write code. Instead of just trying your luck with prompts, no matter how carefully crafted, and then prompting for fixes, spec-driven development starts with clear and structured documents that capture requirements, intentions, and constraints.
In the AI coding era, a specification acts as a guide for AI agents, something they can reference, validate their work against, and use to stay oriented. It’s a North Star that enables agents to take on larger, more complex tasks without losing track of intent.
Spec-driven development replaces the chaos of ad hoc, prompt-driven vibe coding with a structured, durable way for programmers to express their goals. It allows developers to be more specific about particular details and for the agent to communicate its plan ahead of time.
A specification becomes a kind of version-controlled, human-readable super prompt.
How Does Spec-Driven Development Work?
If you simply prompted AI to “implement user permissions,” it might create a standard role-based access control (RBAC) system with admin and user roles. On the surface, the code might look polished and production-ready. But it won’t stop to ask if you need fine-grained permissions, temporary access windows or hooks into an existing identity provider. The generated code looks professional and complete, masking the fact that it solves the wrong problem.
Spec-driven development requires engineers to slow down, think clearly about what they’re building, and communicate in a clear and structured way about:
- Specific input/output formats and data types.
- Explicit business rules and edge cases.
- Integration constraints and existing system dependencies.
- Performance requirements and expected scale.
- Error handling and validation rules.
- Security and compliance requirements.
From there, the agents create a task list of things to do to build the code according to the specifications. Engineers can still interact with agents via prompts and steer them.
From Developer-Agent Collaboration to Multiplayer Coding
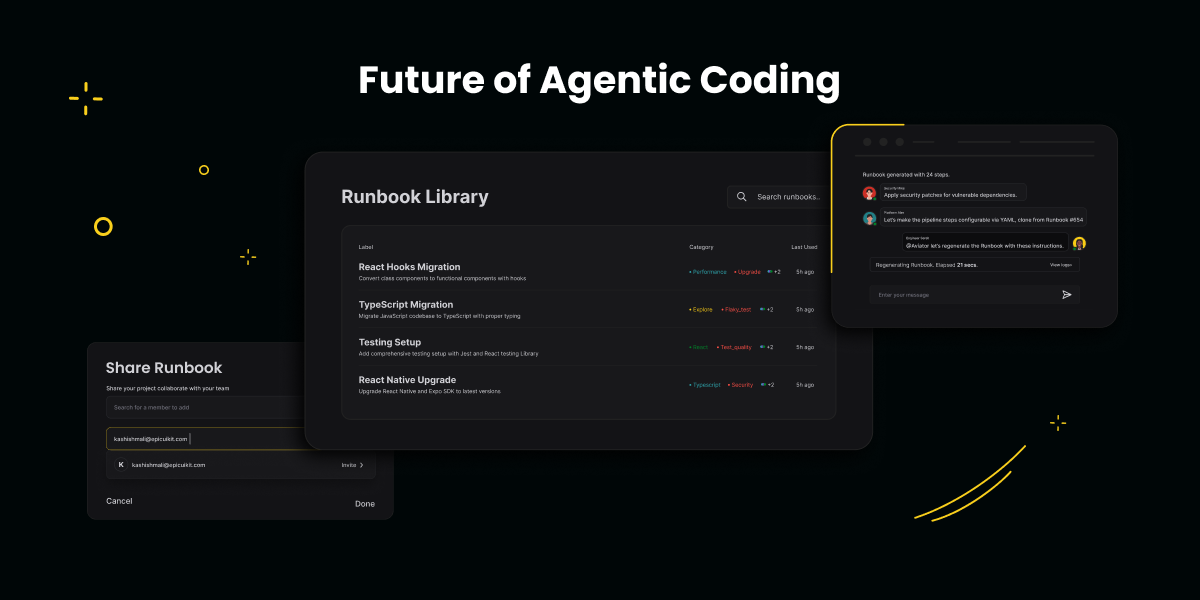
Building software with AI agents isn’t a solo sport, especially in larger engineering organizations. Modern projects often span multiple repositories, microservices, prompts and specs. Imagine adding a “Share” button to your specs to share expertise across your team and delegate execution.
That’s where Runbooks come in. A concept we’ve been developing is to turn AI-assisted coding from a single-player activity into a multiplayer one. Runbooks give teams a shared space to collaborate on prompts, align on execution workflows and maintain a clear audit trail of decisions.
Think of Runbooks as the missing link between product specifications and code. A runbook isn’t just documentation, it’s a living knowledge base that others can pick up, extend and adapt. You can build on top of someone else’s Runbook, transfer context across repositories or code paths, draft your own specs and get feedback, or bring stakeholders and coding agents together in a single, structured session.
Try Runbooks and turn AI coding from individual experiments into team-wide engineering projects.
This article was originally published on The New Stack.