How to set up automated deployment pipelines on Kubernetes using Jenkins
Kubernetes is an open-source container orchestration platform that automates the deployment, scaling, and management of containerized workloads. There are two core pieces in a Kubernetes cluster: The first is the control plane, which is responsible for managing the state of the cluster in production environments. And the second is a set of worker nodes that run the containerized application workloads. The Jenkins server is deployed inside pods running on these nodes.
Jenkins is an automation server that’s used to build, test, and deploy software. Kuberentes works seamlessly with Jenkins to enable end-to-end automation. When developers commit code changes to a GitHub repository, the Jenkins pipeline is automatically triggered. Jenkins then uses Kaniko, which is an open-source tool created by Google as a way to build container images in environments, such as Kubernetes, that may not have access to a Docker daemon. It allows you to build container images from a Dockerfile inside a container or Kubernetes cluster without the need for a Docker daemon. It executes each command from the Dockerfile entirely in userspace, making it more secure and efficient than a typical Docker build.
The Jenkins pipeline then updates the Kubernetes deployment manifest with the new container image tag and applies the changes to the Kubernetes cluster using kubectl. Kubernetes automatically orchestrates the deployment of the new container image, scaling and load balancing the application based on the defined configurations. This automation flow ensures that any changes pushed to the GitHub repository are automatically built, tested, and deployed to the Kubernetes environment, providing a streamlined and reliable continuous deployment process.

Setting up Jenkins and Kubernetes
Prerequisites
- A running Kubernetes cluster and kubectl installed on your workstation
Configuring Jenkins on the Kubernetes cluster
1. Create a Jenkins namespace in your Kubernetes cluster
kubectl create namespace jenkinsWhen you’re installing Jenkins, it’s important to set a namespace that can be dedicated to all the Jenkins-related deployments.
2. Createa YAML file to deploy jenkins-aviator.yaml, using this manifest:
apiVersion: apps/v1
kind: Deployment
metadata:
  name: jenkins
spec:
  replicas: 1
  selector:
    matchLabels:
      app: jenkins
  template:
    metadata:
      labels:
        app: jenkins
    spec:
      containers:
      - name: jenkins
        image: jenkins/jenkins:lts
        ports:
          - name: http-port
            containerPort: 8080
          - name: jnlp-port
            containerPort: 50000
        volumeMounts:
          - name: jenkins-vol
            mountPath: /var/jenkins_vol
      volumes:
        - name: jenkins-vol
          emptyDir: {}
On Kubernetes, this manifest will create a deployment using the Jenkins LTS image and expose ports 8080 and 50000, which can be used to access Jenkins.
3. Create the deployment using kubectl
kubectl create -f jenkins-aviator.yaml --namespace jenkinsOnce the deployment is successfully created, give the cluster a couple of minutes to pull the Jenkins image and set up pods. To verify that the pods are up and running, you can use the following command:
kubectl get pods -n jenkinsYou should receive an output similar to this:
NAME                       READY   STATUS    RESTARTS   AGE
jenkins-655f6c69dd-bwqm9   1/1     Running   0          2m42s
Note: The pod name might be different for your environment.
Now that Jenkins is running inside the pod, you need to expose the running Jenkins pod with a service to access it externally.
4. Create a YAML to deploy jenkins-service-aviator.yaml service, using this manifest:
apiVersion: v1
kind: Service
metadata:
  name: jenkins
spec:
  type: NodePort
  ports:
    - port: 8080
      targetPort: 8080
      nodePort: 30000
  selector:
    app: jenkins

---

apiVersion: v1
kind: Service
metadata:
  name: jenkins-jnlp
spec:
  type: ClusterIP
  ports:
    - port: 50000
      targetPort: 50000
  selector:
    app: jenkins
In the YAML above, we’re simply defining our service (NodePort) and then exposing it to ports 8080 and 50000.
Create the service using kubectl using the same namespace:
kubectl create -f jenkins-service-aviator.yaml --namespace jenkinsYou should get an output similar to this:
service/jenkins created
service/jenkins-jnlp created
Service names in your environment can be different. To verify if the service is running, you can use:
kubectl get services --namespace jenkinsThe expected output should be:
| NAME TYPE CLUSTER-IP EXTERNAL-IP PORT(S) AGE jenkins NodePort <your_cluster_ip> <none> 8080:30000/TCP 95s jenkins-jnlp ClusterIP <your_cluster_ip> <none> 50000/TCP 94s |
5. AccessJenkins UI
To access Jenkins UI, you need to retrieve node IP, which can be done using:
kubectl get nodes -o wideThis command will give you your cluster’s external IP, which can be used to access the Jenkins UI. Copy the external IP and open it in your browser tab with the 30000 port — for instance http://<your_external_IP>:30000
Once it’s open, you should get a Jenkins administrator page asking for the administrator password.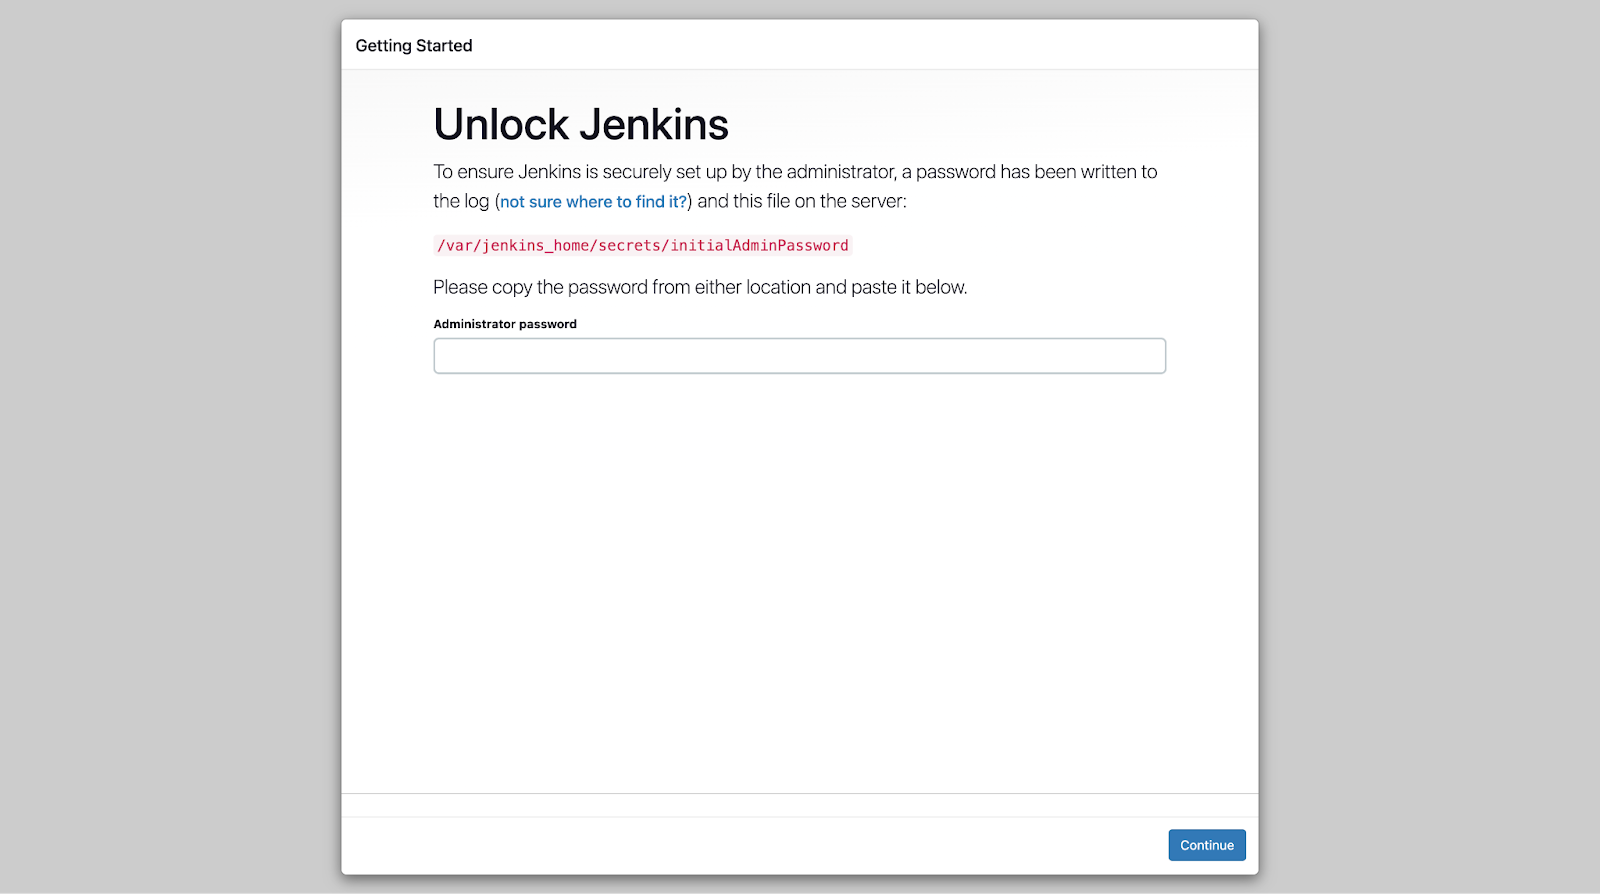
The administrator password can be retrievedfrom the Jenkins pod running on the Kubernetes cluster using the following commands:
- Get the running Jenkins pod names using:
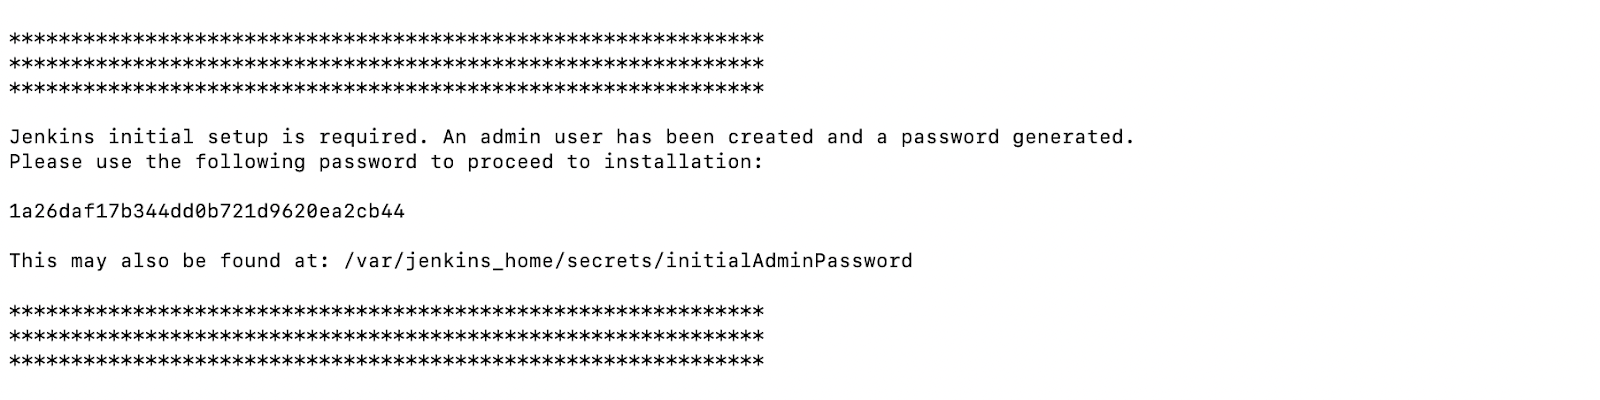
kubectl get pods -n jenkins- Copy the name of the pod and use the following command to fetch this pod’s logs:
kubectl logs <pod name> -n jenkins- Scroll down to see the password and copy it.
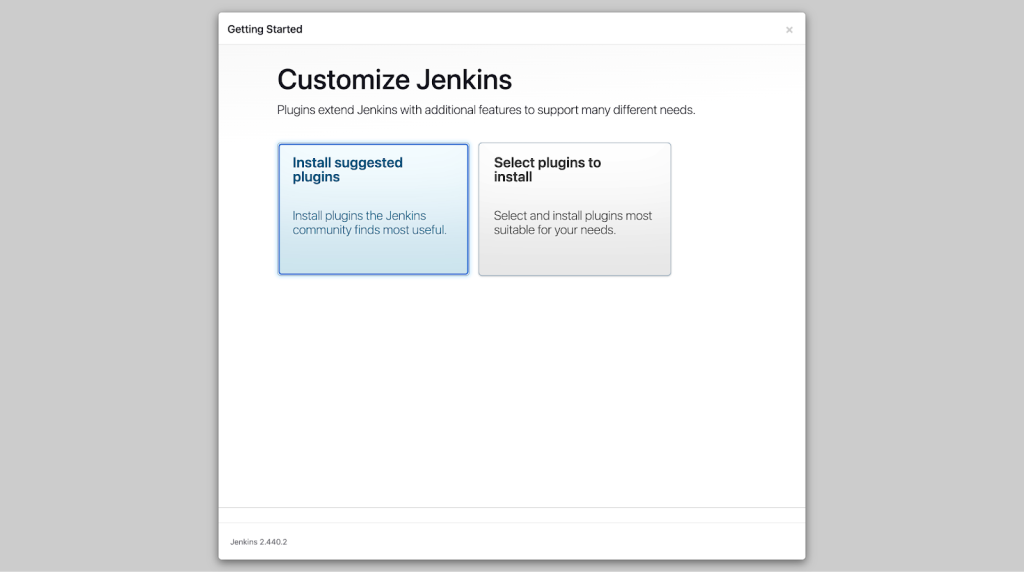
- Once you type your password, you can install suggested plugins, or you can manually select which plugins to install. For this tutorial, we will go with the Install Suggested Plugins option.
It will take a few minutes for Jenkins to install the plugins. 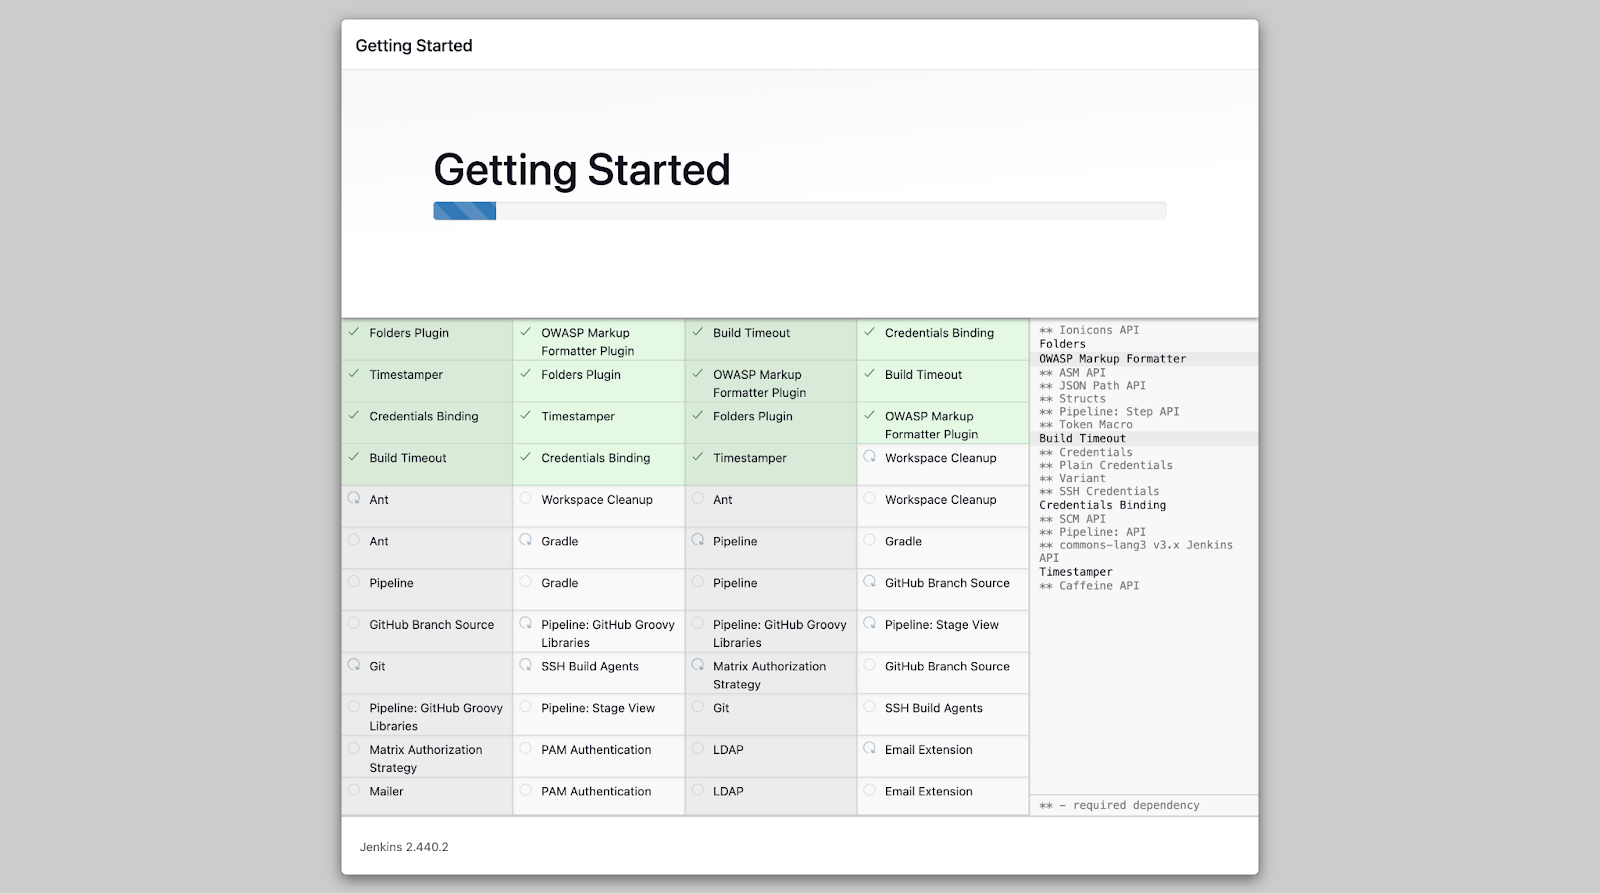
Once the installation is done, Jenkins will ask you to create a new admin user. You can simply fill out all the fields and create a new user, or you can skip creating a new user. In this case, the default username will be admin, and the password will be your_password retrieved from the logs.
When you’re done, you’ll get a screen where Jenkins asks about instance configuration. You can click on Not Now and continue. After this, Jenkins will prompt you with a message: “Jenkins is ready!”
Jenkins will take a few minutes to install the plugins.
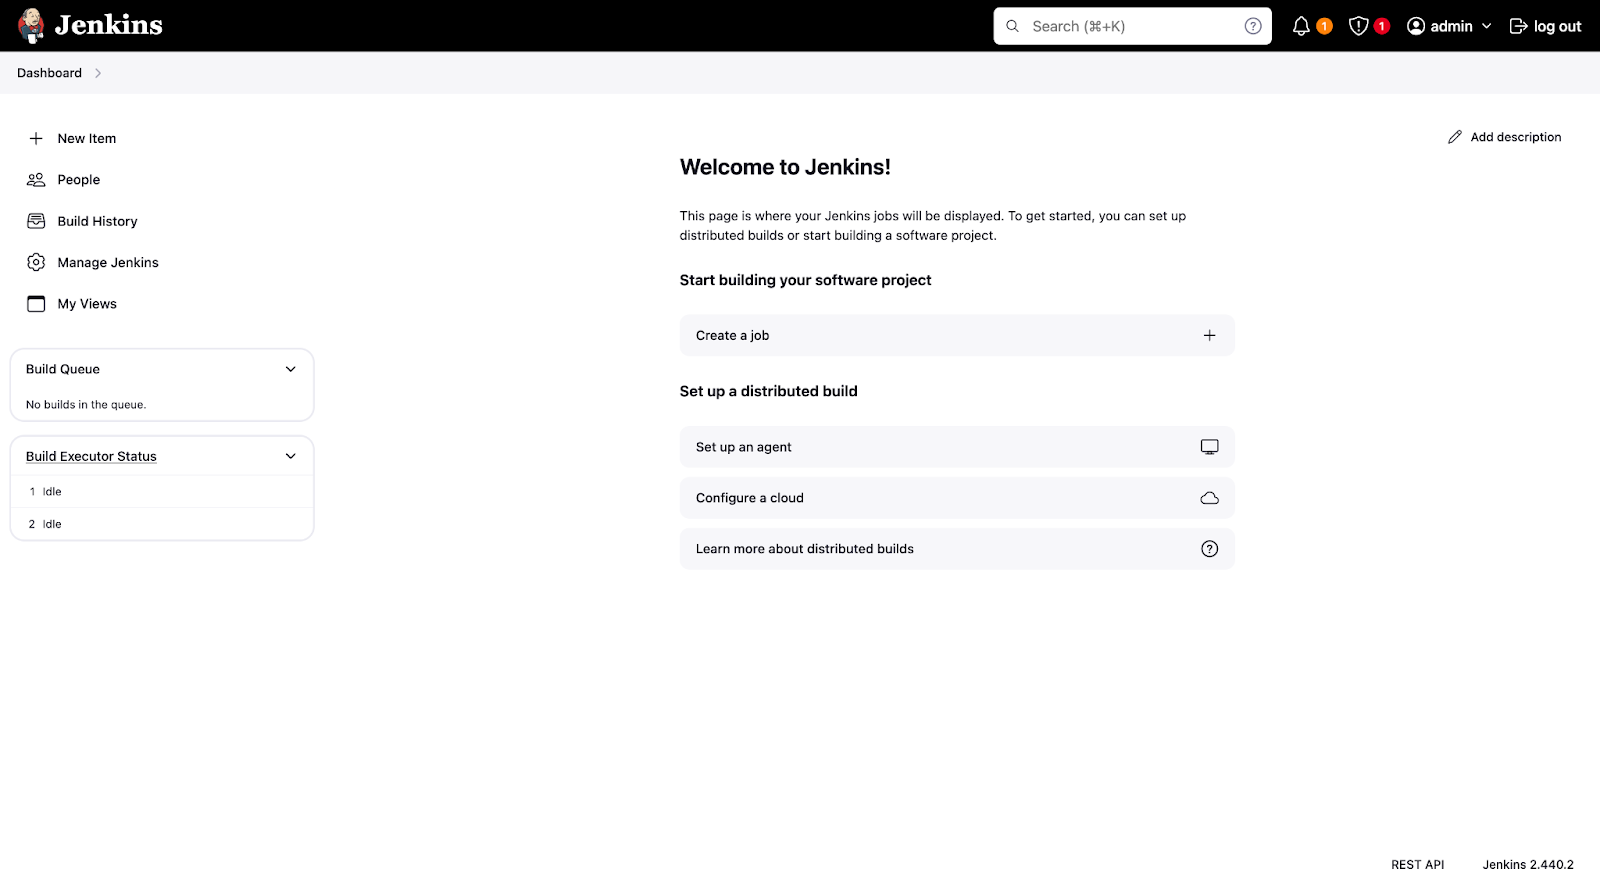
- Click on Start Using Jenkins, and you have successfully installed and configured Jenkins on the Kubernetes cluster.
Creating a Jenkins pipeline for automated deployments on Kubernetes
Now that you’ve installed Jenkins on the Kubernetes cluster, you can create a pipeline to deploy things on Kubernetes using Jenkins. For this article, we’ll deploy a small HTML application. But before starting the development of the pipeline, we need to make sure we have the following plugins installed on Jenkins:
- Kubernetes
- AnsiColor
- Git
We will create a two-stage Jenkins pipeline for our application.
- First stage: Build & Push Image.
- Second stage: Deploy.
You can look at the sample application we created and the Jenkinsfile we will use here.
Jenkinsfile
pipeline {

  options {
    ansiColor('xterm')
  }

  agent {
    kubernetes {
      yamlFile 'builder.yaml'
    }
  }

  stages {

    stage('Kaniko Build & Push Image') {
      steps {
        container('kaniko') {
          script {
            sh '''
            /kaniko/executor --dockerfile `pwd`/Dockerfile \
                            --context `pwd` \
                            --destination={Docker Hub Username}:${BUILD_NUMBER}
            '''
          }
        }
      }
    }

    stage('Deploy App to Kubernetes') {
      steps {
        container('kubectl') {
          withCredentials([file(credentialsId: 'kubeconfig', variable: 'KUBECONFIG')]) {
            sh 'sed -i "s/<TAG>/${BUILD_NUMBER}/" web-app.yaml'
            sh 'kubectl apply -f web-app.yaml'
          }
        }
      }
    }

  }
}
If you look at the Jenkinsfile, you can see the two stages: Kaniko Build & Push Image and Deploy App to Kubernetes.
Stage 1: Build & Push Image
In the Kaniko Build & Push Image stage, you pull the container, which has Kaniko pre-installed and configured. Kaniko will help you build a container from the Dockerfile you created and will also push the Docker image to the container registry, Docker Hub. To do that, you must set your Docker Hub secrets in your Kubernetes cluster. You can do that using the following command:
kubectl create secret docker-registry docker-hub-secret --docker-username=user --docker-password=password --docker-email=email -n jenkinsTo push the containers to your Docker Hub account, you have to mention your username in the destination under /kaniko/executor:
script {
            sh '''
            /kaniko/executor --dockerfile `pwd`/Dockerfile \
                            --context `pwd` \
                            --destination={Docker Hub Username}:${BUILD_NUMBER}
            '''
          }
That’s it, stage one is ready to be executed!
Stage 2: Deploy to Kubernetes
In stage 2, you’re pulling a container with kubectl pre-installed and configured to execute the application’s deploy manifest files. However, Jenkins cannot execute the kubectl command in your Kubernetes cluster. To run the kubectl command, you have to permit Jenkins to set up the configuration. To do this, follow these simple steps:
Step 1: Click on Manage Jenkins
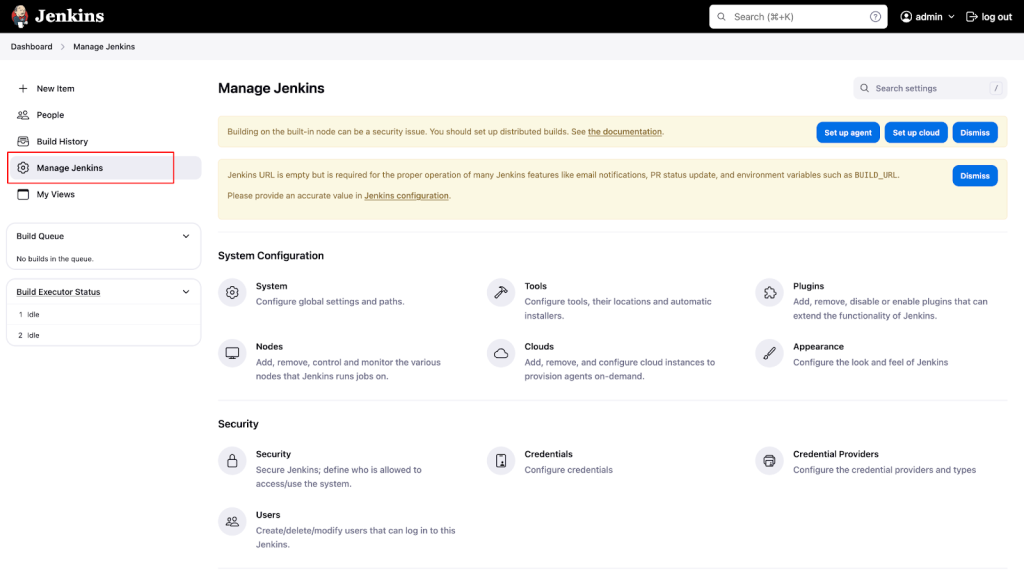
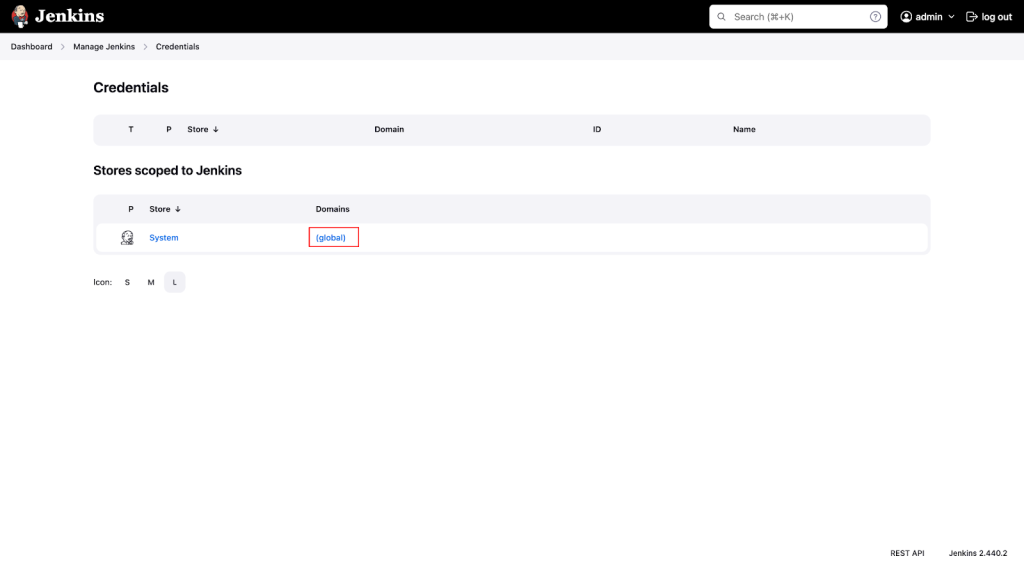
Step 2: Go to Credentials
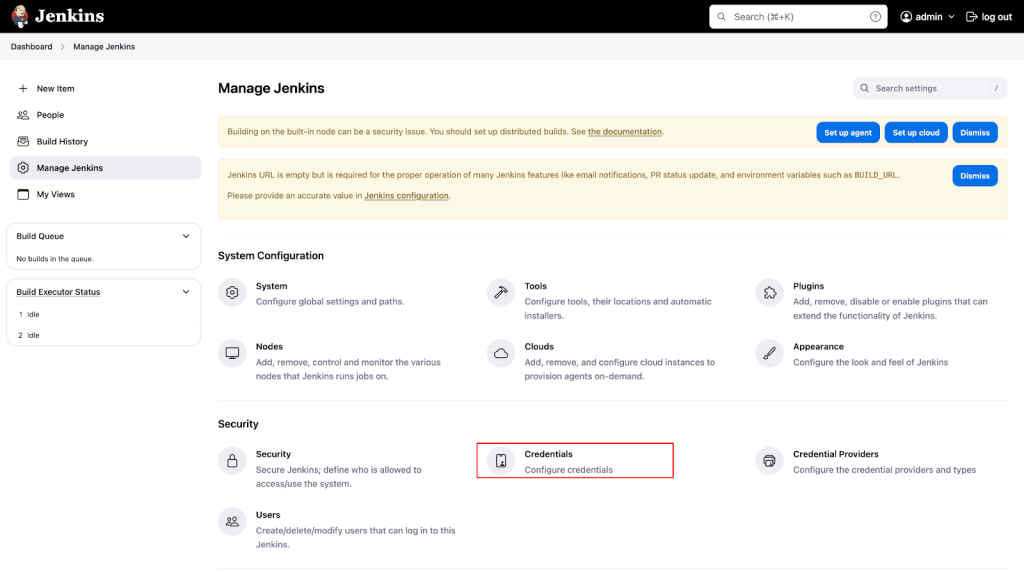
Step 3: Click on Global
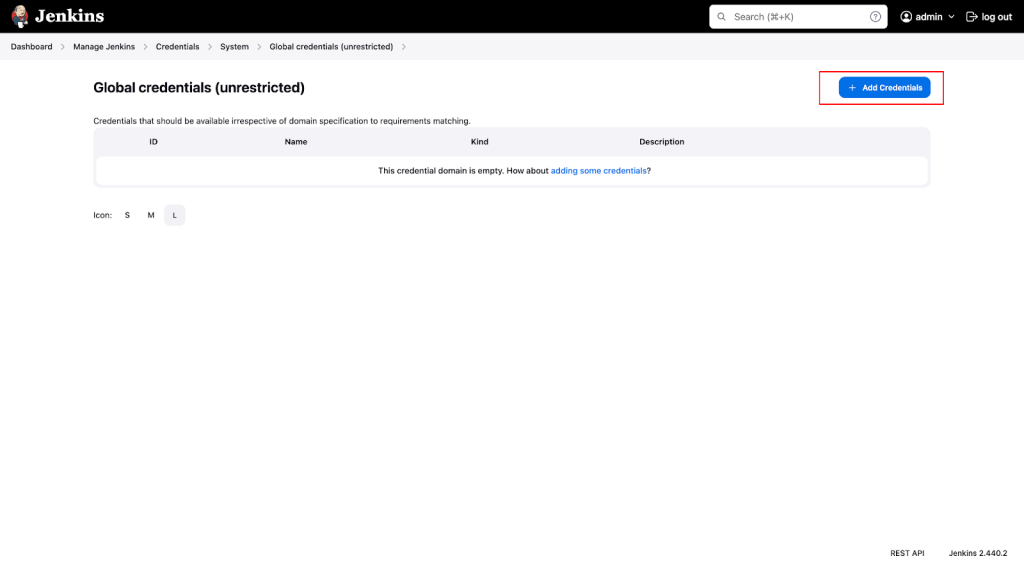
Step 4: Navigate to Add Credentials
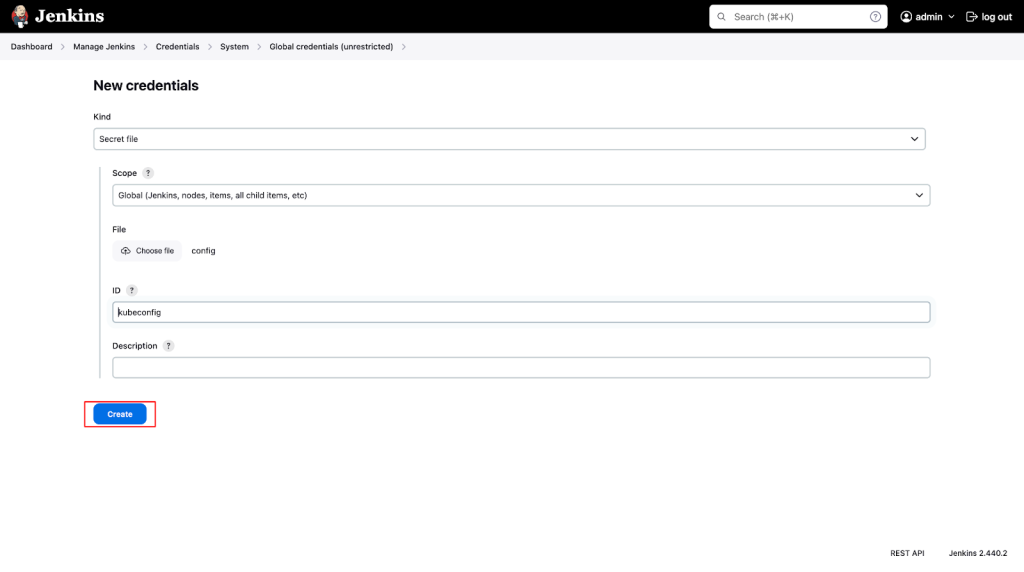
Step 5: Create the credentials
- Select the Secret file in the Kind.
- Global for the scope.
- In file, select the config file from /.kube (Your Kubernetes clusters config file).
- Important: ID should match with the credentialsId value passed in the Jenkinsfile.
Once the credentials are added successfully, you can start creating a pipeline in Jenkins to run your Jenkinsfile.
Creating a pipeline in Jenkins
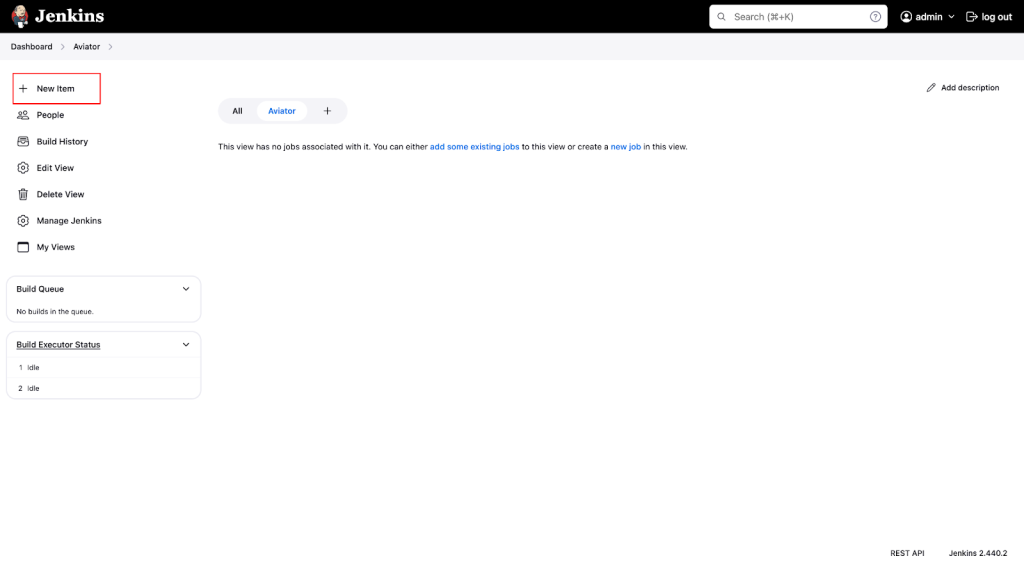
Step 1: Go to the dashboard and Click on New Item
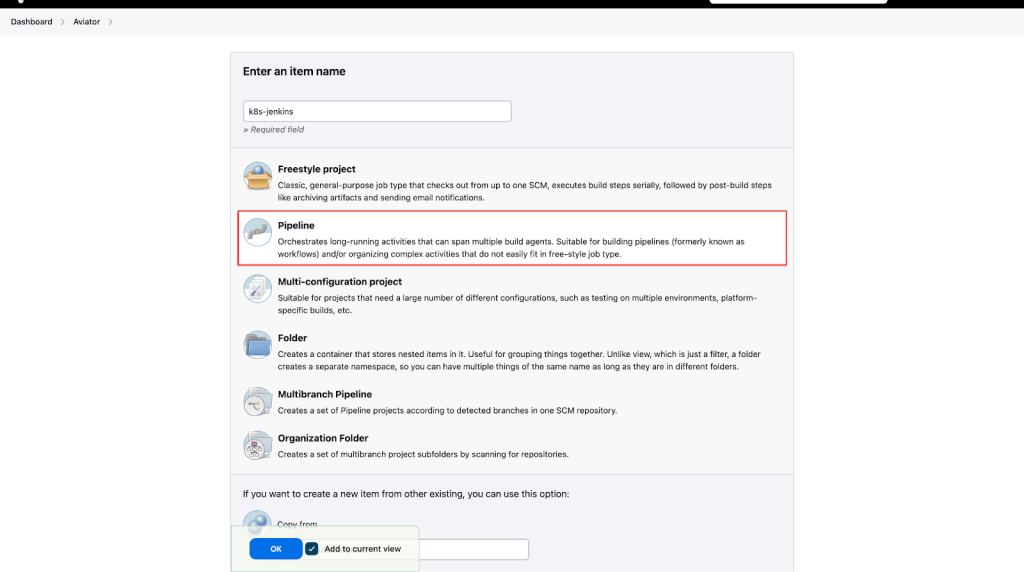
Step 2: Give your pipeline a name and select Pipeline from the options
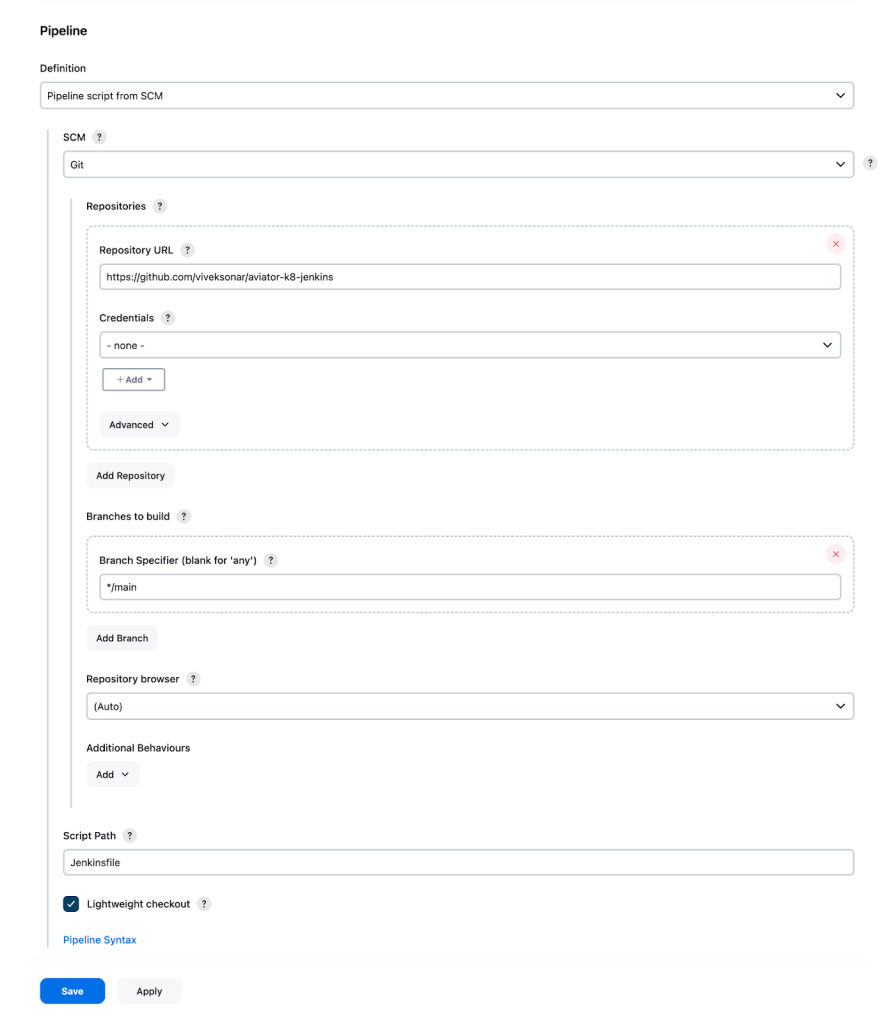
Step 3: Scroll down and configure the pipeline
- Select Pipeline script from SCM in the Definition.
- Git in SCM.
- Enter the repository URL containing the code you want to deploy on Kubernetes and Jenkinsfile.
- Note that you have to modify the Docker file according to your application requirement; the Jenkinsfile in the git repo is for example purposes.
- Give Jenkinsfile as the script path.
- Click Save.
Running your pipeline
Click Build Now to run the configured pipeline.
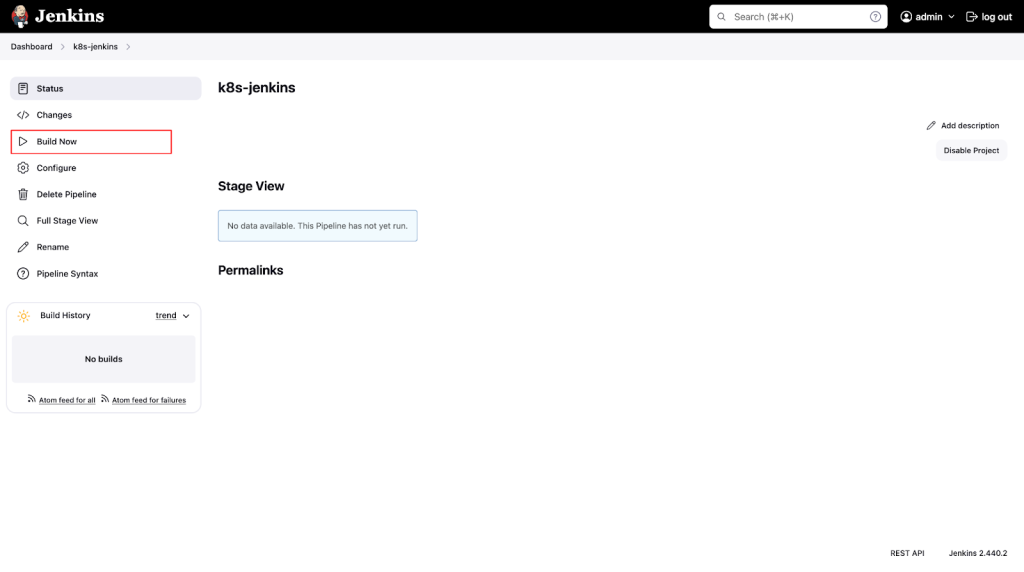
Once the process starts, Jenkins will pull the code from the GitHub repo, and then Kaniko will build an image using the Dockerfile provided and push it to the Docker Hub. In the second stage of the pipeline, the latest image will be configured in the Kubernetes pod configured using kubectl.

And that’s how you automate deployments using Jenkins on Kubernetes.
Best practices and tips
Now that you know how to set up Jenkins on Kubernetes and automate the deployment, let’s examine ways to improve our process.
- Documentation and version control: Documenting your Jenkins pipeline’s workflows, structure, and dependencies is crucial. Proper documentation will make your onboarding and troubleshooting easier. You should always try to keep your Jenkins file in version control so tracking changes and collaboration is easier.
- Parameterization: Parameterization can be used to make the Jenkins pipeline flexible and reusable across different environments.
- Agent management and parallel execution: Effectively manage your Jenkins agent and distribute the workloads evenly to prevent bottlenecks. In your Jenkins file, you can use parallel stages to speed up your deployment process and maximize the allocated resource utilization.
- Monitoring and metrics: Monitor your Jenkins pipeline performance metrics and use them to identify and address performance bottlenecks proactively.
Conclusion
In this blog post, we explored the power of Jenkins to automate and simplify the CI/CD efforts. We covered the fundamental concepts of Jenkins and Kubernetes and walked through the steps to set up Jenkins on a Kubernetes cluster. We then demonstrated how to create a Jenkins pipeline to build, package, and deploy a containerized application to Kubernetes. Organizations can leverage the capabilities of Jenkins and Kubernetes to achieve faster release cycles and to improve scalability and reliability in their software delivery process. Lastly, we covered best practices and tips to ensure the robustness of the deployment pipeline.