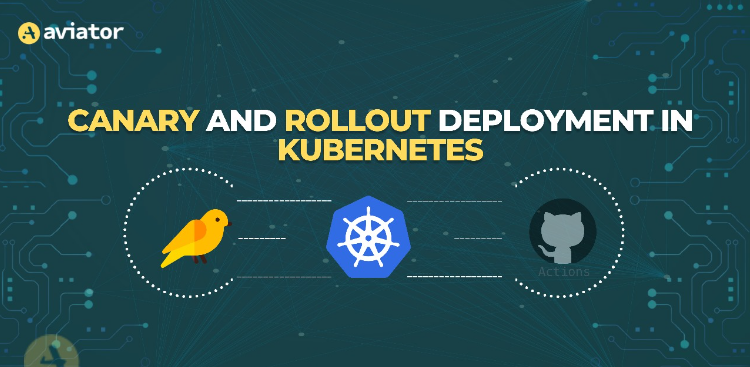
Choosing Canary vs Rollout deployments in Kubernetes
Understand the difference between canary and rollout deployment strategies. Step by step guide explaining how they work locally and configure with Amazon EKS
In Kubernetes, several techniques for deploying applications are available, each suited to different needs and scenarios. These techniques include blue-green deployments, canary deployments, rolling updates, A/B testing, and recreate deployments. Each method offers its approach to managing updates and minimizing downtime.
This blog will focus on canary and rollout deployment strategies, explaining how they work locally and with Amazon EKS. However, these strategies can be used in any version of Kubernetes. We’ll also discuss how to automate these processes using GitHub Actions, providing a detailed guide on implementing canary and rollout deployments from local testing to production environments.
Use a Canary deployment strategy for Kubernetes deployments.
Canary deployment involves deploying two versions of an application, where the new version (the “canary”) is rolled out to a small set of users to test its performance in a real-world environment.
Why choose a canary deployment strategy?
Canary deployments let you introduce a new app version to just a few users first. This way, you can make sure everything works well before rolling it out to everyone. It’s useful for catching issues early, reducing the risk of affecting all your users if something goes wrong. Now, let’s explore how the canary deployment strategy is implemented:
First, deploy the new version of your software to a section of your environment where it won’t affect active users.

After testing—be it functional, unit, or integration tests—and once the feature is tested internally and are confident in the new version, begin directing a small group of users to it. This group could consist of internal team members.

As confidence grows, the scope of the rollout will gradually increase by deploying more pods and broadening the user base that accesses the new version. Once the canary phase confirms stability, a new deployment is scaled up to serve all users, marking the successful completion of the rollout process.

Setup for Canary Deployment
Let’s outline our starting point before we set up a canary deployment. We have developed a simple Flask application, which we’ve dockerized and uploaded to DockerHub.
You can find the Python application code and Dockerfile in our GitHub repository here.
To implement a canary deployment, you need two deployment configurations: one for the deployment that creates the stable version of your application and one for the deployment that creates the canary version.
deployment1.yaml – Stable Version
    apiVersion: apps/v1
    kind: Deployment
    metadata:
      name: python-app-v1
    spec:
      replicas: 9 # Majority of traffic handled here
      selector:
        matchLabels:
          app: python-app
          version: v1
      template:
        metadata:
          labels:
            app: python-app
            version: v1
        spec:
          containers:
          - name: python-app
            image: sakshamawasthi/python-version1:v1
            ports:
            - containerPort: 80
            env:
            - name: VERSION
              value: "v1"
deployment2.yaml – Canary Version
This deployment is the new version you are testing, initially receiving a small fraction of the traffic.
    apiVersion: apps/v1
    kind: Deployment
    metadata:
      name: python-app-v2
    spec:
      replicas: 1 # Small fraction of traffic for testing
      selector:
        matchLabels:
          app: python-app
          version: v2
      template:
        metadata:
          labels:
            app: python-app
            version: v2
        spec:
          containers:
          - name: python-app
            image: sakshamawasthi/python-version1:v2 # New version to test
            ports:
            - containerPort: 80
            env:
            - name: VERSION
              value: "v2"
Initiate Canary Workflow
Apply the Deployments: Start by deploying both versions using kubectl.
    kubectl apply -f deployment1.yaml
    kubectl apply -f deployment2.yaml
Promoting the Canary
If the canary version performs well, you can gradually increase the number of replicas of the canary deployment and decrease the replicas of the stable version.
    kubectl scale deployment/python-app-v1 —replicas=5
    kubectl scale deployment/python-app-v2 —replicas=5
Rejecting the Canary
If the canary version encounters issues, roll it back to minimize impact. This can be done by scaling the canary deployment down to zero:
kubectl scale deployment/python-app-v2 --replicas=0Integrating Canary Deployment with GitHub actions.
So far, we have successfully implemented canary deployment locally using Minikube. Now, let’s move on to updating our CI/CD pipeline to automate this process with GitHub Actions.
Step 1: Set Up Amazon EKS
Before integrating with GitHub Actions, you need an EKS cluster:
Create an EKS Cluster: You can use AWS Management Console, AWS CLI, or eksctl to create a cluster. For simplicity, eksctl is a good choice:
eksctl create cluster --name rollingback --region us-east-1 --nodegroup-name eks-nodes --node-type t3.medium --nodes 3 --nodes-min 1 --nodes-max 4 --managed
This command creates an EKS cluster named “rollingback” with a managed node group.
Step 2: Create a GitHub Workflow
Create a .github/workflows/deploy.yml file in your repository to define the CI/CD workflow:
    name: build and deploy
    on:
      push:
        branches:
          - main
    jobs:
      build-and-deploy:
        runs-on: ubuntu-latest
        steps:
        - name: Checkout Code
          uses: actions/checkout@v2
        - name: Configure AWS credentials
          uses: aws-actions/configure-aws-credentials@v1
          with:
            aws-access-key-id: ${{ secrets.AWS_ACCESS_KEY_ID }}
            aws-secret-access-key: ${{ secrets.AWS_SECRET_ACCESS_KEY }}
            aws-region: us-east-1
        - name: Install kubectl
          run: |
            curl -LO "https://dl.k8s.io/release/$(curl -L -s https://dl.k8s.io/release/stable.txt)/bin/linux/amd64/kubectl"
            sudo install -o root -g root -m 0755 kubectl /usr/local/bin/kubectl
        - name: Set up Kubeconfig
          run: |
            aws eks --region us-east-1 update-kubeconfig --name rollingback
        - name: Deploy Version 1
          run: |
            kubectl apply -f deployment1.yaml
            kubectl apply -f service.yaml
        - name: Deploy Version 2 (Canary)
          run: |
            kubectl apply -f deployment2.yaml
            kubectl scale deployment/python-app-v2 --replicas=1
        - name: Get service info
          run: |
            kubectl get service python-app-service
        - name: Monitor Canary
          run: |
            echo "Monitor canary version v2 for stability and performance"
In this workflow, after deploying Version 1 of the application, we deploy Version 2 as a canary deployment. We scale up the replicas of the new version to 1, allowing only a small portion of traffic to go to Version 2 for monitoring purposes.
This step introduces a canary deployment, allowing you to gradually test the new version in production. You can monitor the canary version before fully rolling it out to all users.
This ensures that canary management is integrated into the GitHub Actions workflow, providing a controlled approach to deploying updates and monitoring their performance.
Step 3: Set Up GitHub Secrets
Configure the required AWS credentials in your GitHub repository’s secrets to secure your AWS access:

Step 4: Deploy and Verify
You can see the progress and results of your deployment workflow by going to the “Actions” tab in your GitHub repository.

The command aws eks –region us-east-1 update-kubeconfig –name rollingback configures kubectl to interact with your AWS EKS cluster, updating the kubeconfig file with the necessary access details.
The kubectl apply -f deployment1.yaml command deploys your application updates to EKS. This step attempts to use your deployment configurations as specified in deployment1.yaml.
If the deployment configurations have remained unchanged since the last update, you might see messages like deployment.apps/python-app-v1 unchanged, indicating that no changes were necessary.
By following these steps, you’ve automated your Kubernetes deployments to EKS using GitHub Actions, providing a secure way to deliver updates to your Kubernetes service application continuously.
Understanding Rollout Deployments
Rollout deployments, or rolling updates, are a way to update applications gradually. This approach is essential in environments where running the application without downtime is required.
What Are Rollout Deployments?
Rollout deployments update applications, in which new versions are introduced incrementally across the entire environment instead of just a small subset of users. Unlike canary deployments, which test the latest version on a small percentage of the traffic before going full scale, rollout deployments gradually apply the updates to all instances.
Kubernetes also supports managing multiple deployments concurrently, allowing for diverse configurations and testing environments to run in parallel.
How Rollout Deployments Work in Kubernetes
Kubernetes does not update all pods at once. Instead, it replaces the old running pods with new ones in controlled phases. This is managed by setting the maxSurge and maxUnavailable parameters in the deployment configuration:
- maxSurge specifies the maximum additional pods that can be created beyond the number you initially selected.
- maxUnavailable sets the maximum number of pods unavailable during the update process.
- The deployment controller in Kubernetes orchestrates the rollout and management of new deployments, ensuring each step meets specified health checks before proceeding.
- During the rollout, Kubernetes performs health checks on new pods as they come online. If a new pod fails these checks, Kubernetes stops the rollout and can automatically roll back to the previous version, depending on the deployment settings. This ensures that issues do not affect the entire application, as only a portion of the pods are replaced at any given time.
- Automatic Rollback: If a failed deployment occurs, Kubernetes’ automatic rollback functionality is triggered to revert to the previous stable version, minimizing downtime.
A load balancer is utilized during the rollout to evenly distribute traffic between the old and new deployments, ensuring seamless user experience.
Steps to Set Up a Basic Rollout Deployment
Before setting up a rollout deployment, let’s establish our starting point. We have created a simple Flask application, dockerized it, and uploaded the image to DockerHub.
Step 1: Create the Deployment Configuration
deployment.yaml
    apiVersion: apps/v1
    kind: Deployment
    metadata:
      name: python-app
      labels:
        app: python-app
    spec:
      replicas: 3
      selector:
        matchLabels:
          app: python-app
      strategy:
        type: RollingUpdate
        rollingUpdate:
          maxSurge: 1
          maxUnavailable: 2
      template:
        metadata:
          labels:
            app: python-app
        spec:
          containers:
          - name: python-app
            image: sakshamawasthi/python-version1:v1
            ports:
            - containerPort: 80
This deployment.yaml specifies the rolling update strategy, essential for implementing rollout deployments. Here’s what each part of the strategy accomplishes:
maxSurge: This setting defines the maximum number of existing pods created above the desired number during the update. In this case, maxSurge: 1 allows one extra pod to be made during the rollout.
maxUnavailable: It is the maximum number of pods that can be unavailable during the update. Setting this to opt out of 2 means two original pods can be taken down before the new pods are ready.
Step 2: Apply the Deployment Configuration
To deploy your application (also supports multiple deployments) using this configuration, save the deployment.yaml file and run the following command:
kubectl apply -f deployment.yamlStep 3: Monitor the Rollout Status
After applying the deployment, you can monitor the status of the rollout to see how the update is progressing:
kubectl rollout status deployment/python-appThis command will provide real-time feedback on the deployment status, showing whether the current rollout out is succeeding or if there are any issues.
Step 4: Update the Application
When you need to update your application, change the image in the deployment YAML file to the new version:

Then reapply the deployment:
kubectl apply -f deployment.yamlKubernetes will start the rollout using the strategy defined in the YAML file.
Step 5: Verify the Deployment
Check the details of your deployed pods to ensure they are running the new version:
kubectl get pods -l app=python-app -o wide
This command lists all pods with the label app: python-app, showing their status and the node they are running on.
Step 6: Rollback if Necessary
If you detect issues with the new version, Kubernetes allows you to rollback to the previous version:
kubectl rollout undo deployment/python-appThis command in the command line reverts the deployment to the previous stable version.
How to do Rollout Deployments using GitHub Action
As discussed earlier, setting up your deployment to Amazon EKS with Github actions involves several preliminary steps, such as configuring AWS credentials and preparing your Kubernetes configurations.
Assuming you’ve followed those steps, the GitHub Actions workflow file is the only difference. Below is the deploy.yml file that automates the deployment of your application to Amazon EKS every time changes are pushed to your main branch:
    name: Deploy to EKS

    on:
      push:
        branches:
          - main

    jobs:
      build-and-deploy:
        runs-on: ubuntu-latest
        steps:
        - name: Checkout Code
          uses: actions/checkout@v2

        - name: Configure AWS credentials
          uses: aws-actions/configure-aws-credentials@v1
          with:
            aws-access-key-id: ${{ secrets.AWS_ACCESS_KEY_ID }}
            aws-secret-access-key: ${{ secrets.AWS_SECRET_ACCESS_KEY }}
            aws-region: us-east-1

        - name: Install kubectl
          run: |
            curl -LO "https://dl.k8s.io/release/$(curl -L -s https://dl.k8s.io/release/stable.txt)/bin/linux/amd64/kubectl"
            sudo install -o root -g root -m 0755 kubectl /usr/local/bin/kubectl

        - name: Set up Kubeconfig
          run: |
            aws eks --region us-east-1 update-kubeconfig --name rollingback

        - name: Deploy to Kubernetes
          run: |
            kubectl apply -f deployment.yaml
            kubectl apply -f service.yaml

        - name: Get service info
          run: |
            kubectl get service python-app-service
In this workflow, after deploying Version 2 of the application, we perform a rollback deployment to revert to a previous known stable version. This rollback step ensures that any issues introduced with the latest update can be swiftly addressed by reverting to a previous known stable state.
You can see the progress and results of your deployment workflow by going to the “Actions” tab in your GitHub repository.

The command aws eks –region us-east-1 update-kubeconfig –name rollingback configures kubectl to interact with your AWS EKS cluster, updating the kubeconfig file with the necessary access details.
By following these steps, you’ve automated your Kubernetes deployments to EKS using GitHub Actions for rolling back deployment, providing a secure way to continuously deliver updates to your application.
Canary vs. Rollout Deployments
To help you understand the differences between canary and rollout deployments and when you might choose one.
| Aspects | Canary Deployment | Rollback Deployment |
| Definition | Deploys a new version to a controlled group of users before a full release. | Updates are distributed gradually across all instances to avoid downtime. |
| Risk-Management | High control, typically involving up to 10% of user traffic initially. It allows for manual control of the full traffic deployment after verification, providing a thorough monitoring and verification process. | Rollback has more risk than canary deployment. About 50% of traffic may be affected during the initial stage of the update. Rollback primarily relies on health checks and provides less direct control over the deployment process than canary. |
| Rollback | Quick rollback using kubectl rollout undo affects minimal traffic. | Rolling back with kubectl rollout undo can affect more users if issues are detected. |
| Resource Requirement | Requires resource allocation for both the old version and new versions using kubectl scale deployment –replicas=X. | Efficient use of resources by managing replicas incrementally with kubectl scale. |
Conclusion
We’ve covered the essentials of deploying applications using canary and rollout strategies in Kubernetes, focusing on their application both locally and on Amazon EKS. We also explored how to streamline these deployments with GitHub Actions. Whether opting for a gradual rollout to manage risks or a canary strategy for testing new features with minimal user impact, these methods ensure efficient and safe updates. This guide should help you implement these strategies effectively, enhancing your deployment processes in any Kubernetes environment.
Commonly asked questions.
Q 1. How does rollout deployment work?
Rollout deployment gradually updates all users by replacing old versions with new ones in stages. This minimizes disruptions if problems arise since not all parts of the application are updated at once.
Q 2. What are the benefits of canary vs. rollout deployment?
Canary deployments are beneficial for testing new features on a small scale before a full rollout, reducing the risk of major issues. Rollout deployments, however, provide a systematic update to all users, which can be controlled and reversed if necessary, offering a balance between innovation and stability.
Q 3. When should you use canary deployment?
Use canary deployment when introducing significant changes that could potentially disrupt the user experience or when you need to test new features in a live environment without impacting all users.
Q 4. What are the best practices for rollout deployment?
Best practices for rollout deployment include setting up proper health checks, using phased updates to manage changes, and ensuring that there is a quick rollback plan in place to undo the current deployment, if things go wrong.