Rebase vs. Merge: Pros and cons
Managing repository history is one of the critical parts of keeping your code base scalable. Many approaches might be helpful in one case and not work in another. Here we will discuss how git merge and git rebase differ from each other.
Let’s have a look at how both commands work.

Git rebase
As the git official docs state: “Reapply commits on top of another base tip,” this reapply will place all commits on the current branch on top of the target branch. Let’s take an example here:

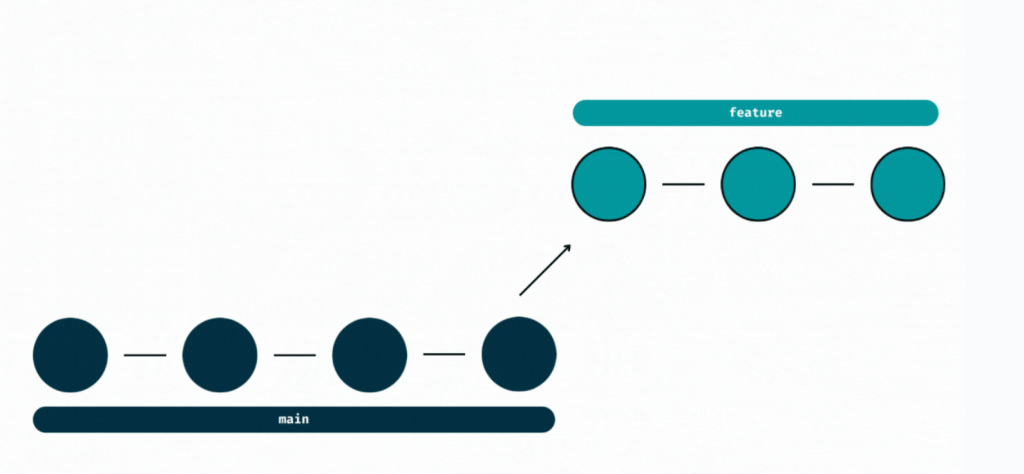
Assume the following history exists and the current branch is a feature:
           A---B---C feature

         /

    D---E---F---G main
From this point on, feature as the result of the following commands:
git rebase main
would be:
                   A'--B'--C' feature

                 /

    D---E---F---G main
Now all the commits done on the feature branch are re-aligned on top of the new state of the main branch. During this process, all commits on the feature branch are rewritten and have new commit IDs. If there is any conflict in between the rebasing process, git will stop the process and ask you to resolve conflicts before proceeding.
Here are the options available with the git rebase command.
Git merge
According to the official docs: “Join two or more development histories together,” it is a non-destructive operation that adds a forked stream on top of the target stream without rewriting commits.
Here is what it will look like in our example:
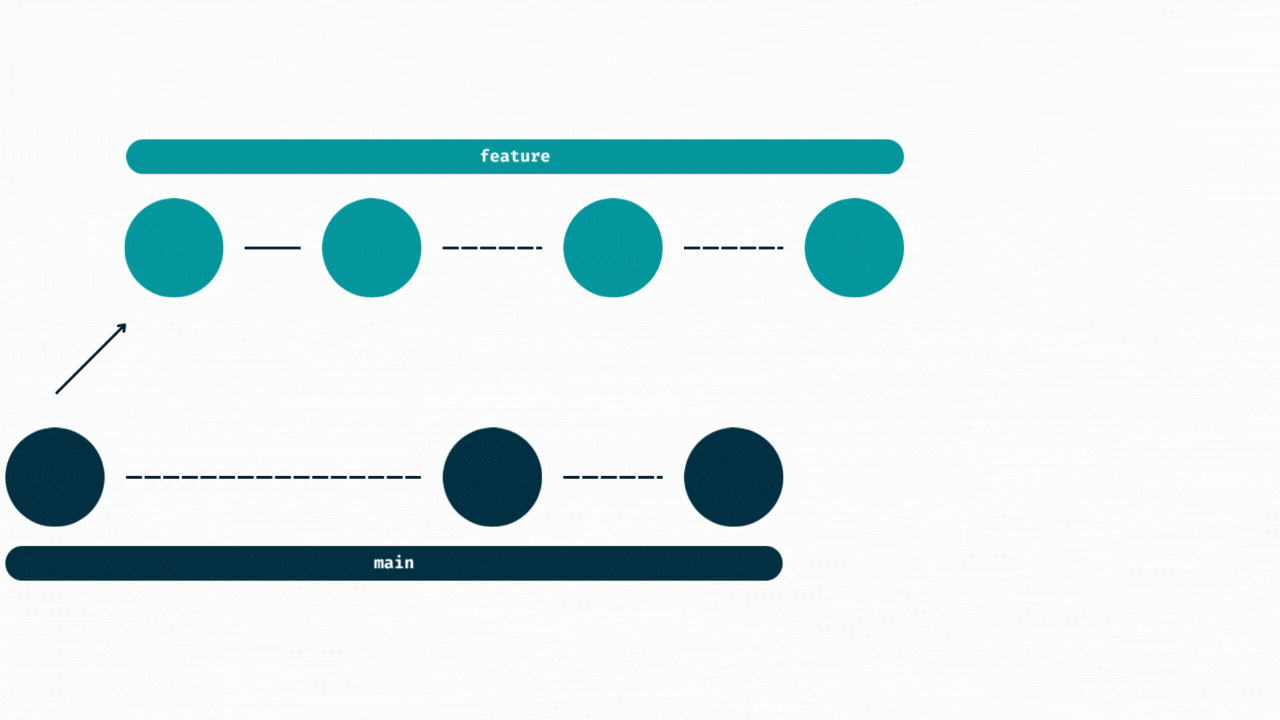
Assuming the feature branch is forked from the main branch, with the main having commits applied after the fork was created, the state of the repository will look like this:
           A---B---C feature

         /

    D---E---F---G main
From this point on, the feature:
git merge main
Would result in the following output:
          A---B---C feature

         /         \

    D---E---F---G---H main
Here, H is the new commit on top of the feature branch that has the full stream coming from main.
A new commit will be created on the feature branch that might feel unnecessary. But, on the flip side, the commit history is intact and commits are not re-written. Git will ensure the merge is safe and will prompt in case of any conflicts just like the rebase command.
This is what our feature branch will look like now.
Differences
Both commands as seen may offer similar results but differ in how they achieve them. These differences can have a significant impact on how your commit history looks in the long run.
We have identified a few of the most important differences that can help you better understand both; Remember we aren’t establishing any conclusions just yet, we will discuss pros, cons, and use cases later in the post.
Commit logs
For merge it keeps the commit history intact with the merge commit showing on top, while rebase rewrites, it means the timestamp of actual commits is lost and new commit IDs are created.
Commit history
On the other hand, when the feature branch is merged in main, it may create a single commit so the implementation details go away after merge. Rebase eliminates the extra merge commits and makes commit history linear with all commits of feature lined up together.
Conflict resolution
Both commands handle conflicts differently – merge being more focused on bringing the stream on top of the other will show conflicts at once, while rebase processes one commit at a time. Hence, it presents conflicts on each commit.
Benefits
Both commands in the discussion are super useful in their own capacity. Let’s dive into what each command offers as compared to each other.
Merge
- Simple & easier to handle, it can be done via most git management UIs
- Timestamps of commits are maintained which might be necessary in some regulatory cases.
- Maintains all activity done on the branch as it occurred.
Rebase
- Streamlines a commit history for a feature allowing other devs to see how
featurewas implemented - Avoids extra merge commits that to keep commit logs clean
- Possibility to truncate useless commits to make sure only significant changes are logged in git logs.
Pitfalls
Just like benefits, there are certain pitfalls associated with both commands, we have listed a few of them to help you avoid mistakes that can be costly in the future.
Merge
- ⚠️ Merging public branch to feature will make it ugly, commit history is an important tool for debugging. Having a linear commit history will help diagnose future issues.
- ⚠️ Resolving conflicts with
mergecan be tricky as it brings all commits from the source at once.
Rebase
- ⚠️ Never use
rebaseon a public branch, it rewrites the commit history and requires force push which should be prohibited on public branches. - ⚠️ You might be a fan of rebase due to its simplicity. But, keeping your entire history may be essential to meet regulatory and compliance requirements.
- ⚠️ The learning curve for rebase can be steep for teams, but the fruits it bears are worth all the effort that goes into it.
Use cases
Feature Branch Sync With Main [ Rebase ✅ | Merge ⚠️]
This use case is the best fit for rebase command, as we have seen in the examples above, having a feature branch forked out of main has to be in sync with main before we merge it.
In such cases rebase works best as it will bring all feature-based commits together on top of main resulting in a linear history of how feature was developed. With merge, it produces an extra commit on the feature branch and might be a little tough on resolving conflicts.
Updating a public branch [ Rebase ❌ | Merge ✅ ]
When your features are ready to be shipped into public branches (e.g develop, main, staging, etc.) it’s always the merge command that one should use. The golden rule for rebase says “Never rebase public branches”.
Since rebase rewrites commit history it requires force push to sync the remote branch with a new commit history. It is highly recommended to keep your public branches protected and stop force push on these branches. For public branches, rebase is not appropriate.
Squash Intermediate Commits – Cleanup [ Rebase ✅ | Merge ❌ ]
During fast-paced development, we tend to create many intermediary commits that must be removed before we push our code to remote. In such cases, only rebase with interactive mode is a solution that allows us to drop, squash, and reword commits in our stream.
Conclusion
In most scenarios, we use both of these super helpful commands in the same repositories.
For most of the use cases each time a feature branch is ready to be shipped in the public branch, it is rebased on top of public branch and then merged (squashed or rebased) in the public branch. An in-depth understanding of both commands will allow you to leverage all the best they offer to make your commit history more clean and readable.
I am always looking for more use cases to discuss, feel free to comment below. I’d love to have a healthy discussion around it!
Aviator: Automate your cumbersome merge processes

Aviator automates tedious developer workflows by managing git Pull Requests (PRs) and continuous integration test (CI) runs to help your team avoid broken builds, streamline cumbersome merge processes, manage cross-PR dependencies, and handle flaky tests while maintaining their security compliance.
There are 4 key components to Aviator:
- MergeQueue – an automated queue that manages the merging workflow for your GitHub repository to help protect important branches from broken builds. The Aviator bot uses GitHub Labels to identify Pull Requests (PRs) that are ready to be merged, validates CI checks, processes semantic conflicts, and merges the PRs automatically.
- ChangeSets – workflows to synchronize validating and merging multiple PRs within the same repository or multiple repositories. Useful when your team often sees groups of related PRs that need to be merged together, or otherwise treated as a single broader unit of change.
- FlakyBot – a tool to automatically detect, take action on, and process results from flaky tests in your CI infrastructure.
- Stacked PRs CLI – a command line tool that helps developers manage cross-PR dependencies. This tool also automates syncing and merging of stacked PRs. Useful when your team wants to promote a culture of smaller, incremental PRs instead of large changes, or when your workflows involve keeping multiple, dependent PRs in sync.